Best Snowflake Nail Ideas to Try This Winter
This winter, whether you’re in the office or your home, you’ll want to keep your nails looking fresh and chic. For some inspiration on how to do that, we’ve rounded up a few of our favorite nail art ideas for this season. From sparkly silver snowflakes to bold red Christmas trees with festive greens and candy canes – there’s something for everyone! With easy-to-follow tutorials and step-by-step instructions, these designs are perfect for beginners too. So, get out those polishes and brushes because it’s time to design some beautiful nails!
What is it about winter that makes us want to curl up on the sofa with a good book and a steaming hot drink? We don’t know, but if we have any say in it, we’ll be curled up with both of those things while sporting a beautiful set of nails. After all, nails are an accessory – they dress up our fingers and turn a simple manicure into something truly unique! So, whether you’re spending time at home this season or going out into the cold, here are some snowflake nail art ideas that you should try.
Adorable snowflake nail designs
Snowflake nails are the perfect way to get into the winter spirit, and they’re also a great way to show your festive side. These nails can be dressed up or down, making them perfect for any occasion. If you’re looking for some inspiration, we’ve got you covered. Here are some of our favorite snowflake nail designs:

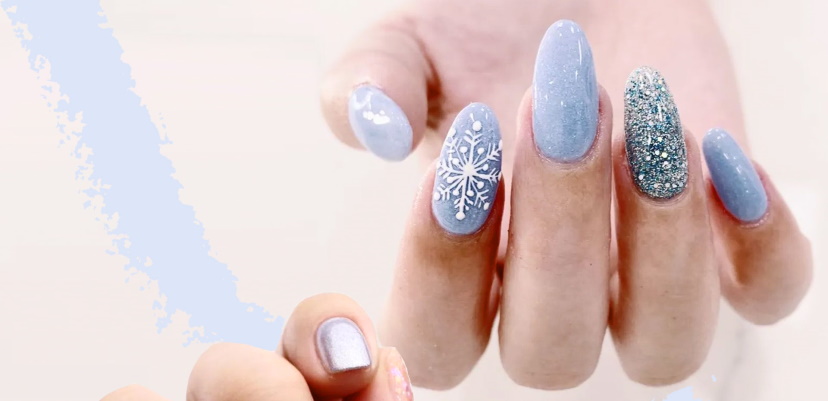
Multi-colored Snowflakes
This design is perfect for anyone who loves color. Start by painting your nails with a light blue base coat. Once it’s dry, use white nail polish to paint snowflakes onto your nails. You can make them as simple or as intricate as you want. Next, use a different color for each nail to paint the border of the snowflakes. We used pink, purple, yellow, orange, and green. Finally, finish off the look with a glossy topcoat.
Black Snowflakes
This one is just as great for winter weddings as it is for New Year’s Eve parties. This design looks pretty, no matter how you decide to decorate each snowflake. We decided to go with white lines around our snowflakes for this one to pop against our black background. First, paint your nails with a base coat of black nail polish. Then use a thin brush or toothpick dipped in white nail polish to create snowflake designs on your nails. Wait until they dry before painting another coat of black over the top.
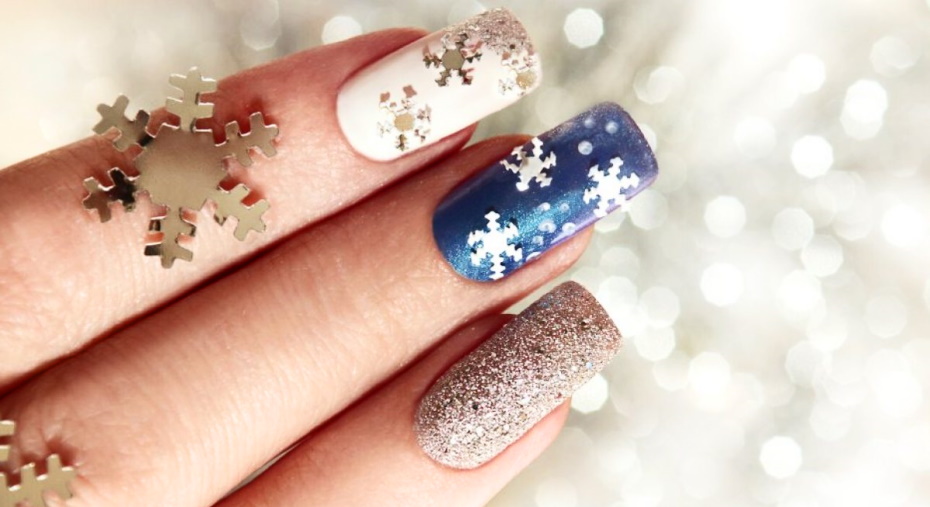
Glitter Accent Nails
This design is for you if you want a more subtle snowflake look. Start by painting your nails with a base coat of white nail polish. Once it’s dry, add a layer of glitter polish to your accent nails. We used silver glitter, but any color will work. Once the glitter has dried, use black nail polish to paint the outline of your snowflakes. Add one or two more layers of black polish over the top, ensuring that the glitter stays on your accent nails. Finish with a glossy topcoat, and you’re done!
Snowflake nails have been popping up on Instagram and Pinterest lately, and it’s not hard to see why. They’re beautiful, intricate, and can be worn as a statement piece or as an accent nail with other designs. The possibilities are endless because there is no right or wrong way to do them. Whether you want something simple or more detailed, there’s a snowflake design for everyone. Check out these different ways of wearing them below!